Hello, y'all!
Today I'd like to speak of ImageDataGenerator in TensorFlow. Some of you may have heard of it but if you haven't, you are going to love it, probably.
You may have been sick of it that going over all the folders and reading images inside them. If you use os.walk(), os.listdir() or something similar, then you already know that it takes a bit of effort to think which folder belongs to which label, bla bla. You have been saved, my friend. Keras has a generator called ImageDataGenerator which is so useful. I will be giving just a short summary, you can totally check it out if you'd like to. I added a link below.
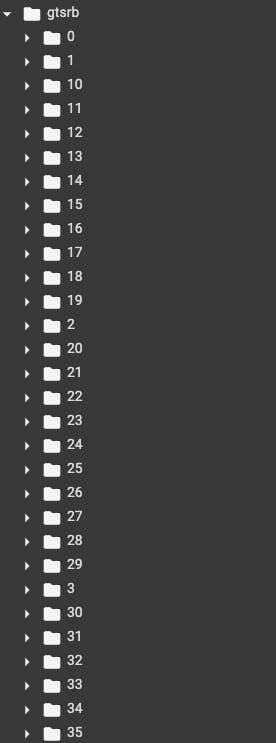
Now let's see how to get all of our images from a folder. Imagine I have a folder like in the picture.

As you can see I have over 30 classes in my dataset and I do not want to consume both my memory by reading all of them and my time. Instead, I will be using ImageDataGenerator.
from tensorflow.keras.image import ImageDataGenerator
image_datagen = ImageDataGenerator()
As can be seen, I have created an ImageDataGenerator object. I am using the object for two purposes;
Creating Train Generator
Creating Validation Generator
train_generator = image_datagen.flow_from_directory(
        'data/train',
        target_size=(224, 224),
        batch_size=16,
        class_mode="categorical")

test_generator = image_datagen.flow_from_directory(
        'data/test',
        target_size=(224, 224),
        batch_size=16,
        class_mode="categorical")
That'll be all. We made our program ready for the dataset for us. Of course, if we do not use them in training, it would be for nothing.
model.fit(
        train_generator,
        steps_per_epoch=500,
        epochs=100,
        validation_data=validation_generator,
        validation_steps=80)
We are all set! Almost no struggle. Last but not least, I would like to point out something valuable in these generators. They are able to augment your data as much and as different as you want. The following code block is from the website I've added at the very least of the post.
tf.keras.preprocessing.image.ImageDataGenerator(
    featurewise_center=False,
    samplewise_center=False,
    featurewise_std_normalization=False,
    samplewise_std_normalization=False,
    zca_whitening=False,
    zca_epsilon=1e-06,
    rotation_range=0,
    width_shift_range=0.0,
    height_shift_range=0.0,
    brightness_range=None,
    shear_range=0.0,
    zoom_range=0.0,
    channel_shift_range=0.0,
    fill_mode='nearest', cval=0.0,
    horizontal_flip=False,
    vertical_flip=False,
    rescale=None,
    preprocessing_function=None,
    data_format=None,
    validation_split=0.0,
    dtype=None
)
Those parameters—can be seen above— come with default values which is None for almost all of them.
The vast majority of people, who have been trained at least one model in their life, have seen—or even used it— the following code block:
X_train, X_test, y_train, y_test = train_test_split( X, y, test_size=0.33, random_state=42)
I may have heard a voice that goes "It is easy okay, but how do I get to split my data? Do I have to go over all of the files and choose %25 of them and copy them into data/test??" NO WAY! You can see the "validation_split=0.0" parameter in the code block above. Now you are able to use it for splitting your dataset into train and test.
from tensorflow.keras.image import ImageDataGenerator

image_datagen = ImageDataGenerator()

train_generator = image_datagen.flow_from_directory(
        'data'/,
        target_size=(224, 224),
        batch_size=16,
        class_mode="categorical",
        subset="training")

validation_generator = image_datagen.flow_from_directory(
        'data/',
        target_size=(224, 224),
        batch_size=16,
        class_mode="categorical",
        subset="validation")

model.fit(
        train_generator,
        steps_per_epoch=500,
        epochs=100,
        validation_data=validation_generator,
        validation_steps=80)
And that's the end of it..
Always a pleasure to read feedback. I can be easily found. Thank you for reading!
** Reference: **
